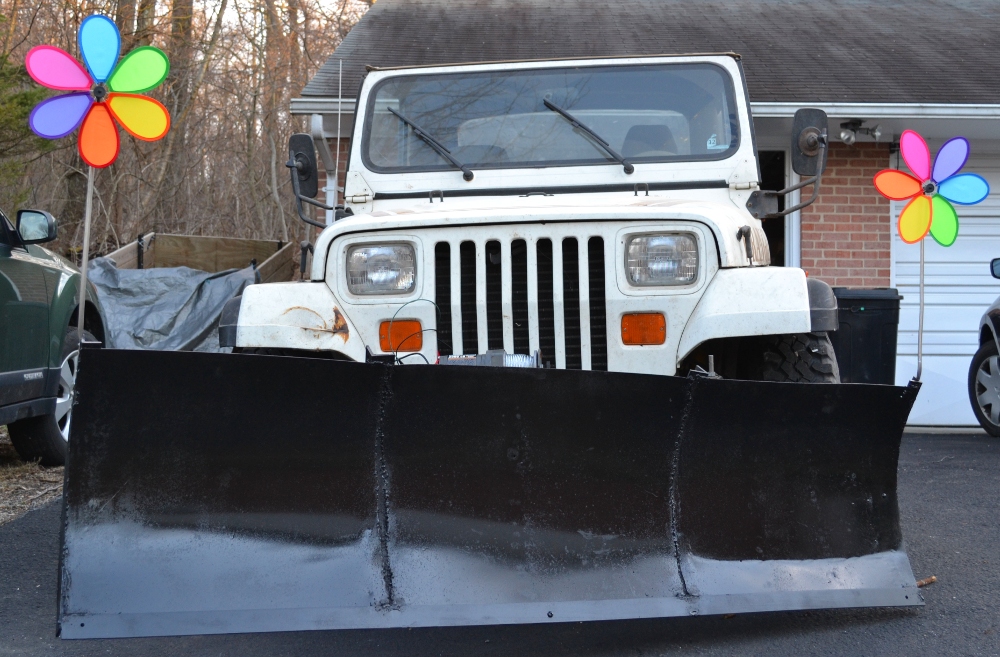
Our first glimpse of the house that we now own came from the bottom of the 400 ft. driveway where our car had just gotten stuck. In the time between deciding to buy the place and the closing, the storm in early 2010 known here around the Washington DC area as snowmageddon happened and it was clear that if we were going to live on top of the Blue Ridge I would need a plow. I had a Jeep already and started looking for used plows in papers and on the net. They were all either extremely expensive, needed tons of work, or not really the right size for the Jeep. The only one that I found worth getting was at the scrap yard and the owner told me that he was keeping it to put onto a skid loader. We'll it's still sitting there in his scrap pile after two years and I bought enough other scrap from him (with some significant augmentation from my Dad's treasure trove of scrap) to build my own plow. Not counting my time, which of course is priceless, this plow cost less than $200 - an order of magnitude less than a new one of the same capability. Because my other project pages over the years have been so popular, I'm putting one up for this as well. This is not a how-to page, it's just a how-I-did-it page.
The entire plow is hand built. The only major part that I bought is the winch that lifts it. It came from Harbor Freight (SKU #68146) and I got it on sale for $59.99 plus shipping. It is a 2000 lb model which lifts the blade in a couple of seconds and has been great so far in testing. The important thing about it is that the line is controlled under load both in and out and it has a brake so the plow stays where you leave it when you take your finger off the switch. The switch is mounted in the cab. The winch itself is just mounted on a piece of flat 3/8" steel from a trailer hitch out of the scrap yard. I tapped it for 2 5/16" bolts and welded it directly to the bumper. One could imagine more elegant setups but this seems to work great. The winch has plenty of power to lift the plow. So if the plow develops a tendency to jump I'll be able to add a coil-over shock between the yoke and the bumper.
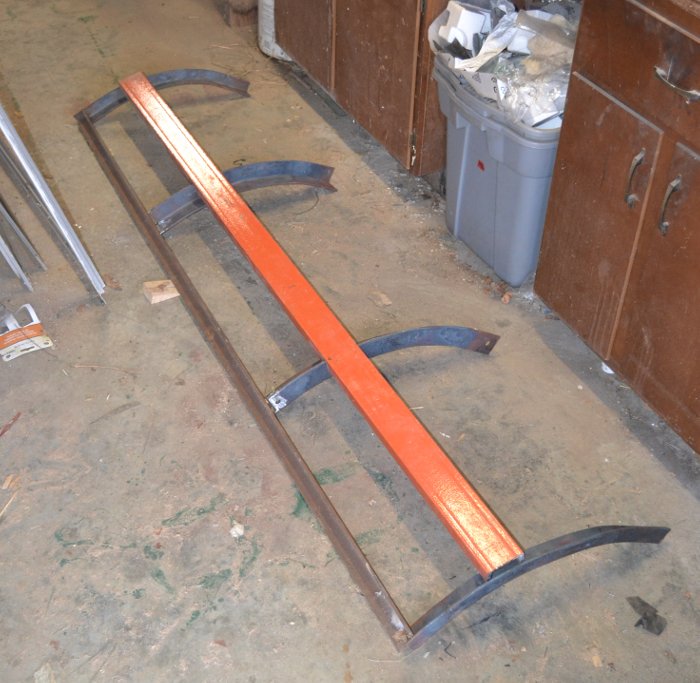
The first part that I built was the blade. It started with an angle and channel frame.
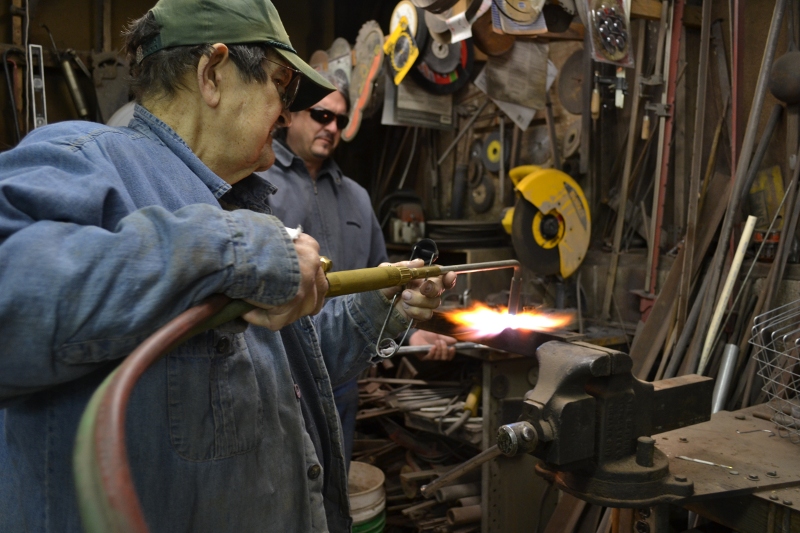
The most difficult part was bending the two inch angle that I used to make the uprights.
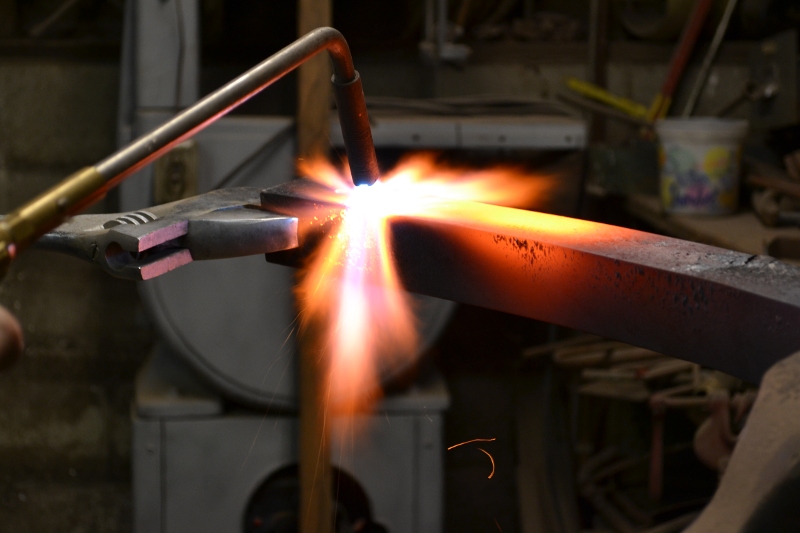
I first tried my acetylene torch but it was using huge amounts of gas just to get one bend and it is really a two person job. My backup plan was to notch the back of the angle, bend it, and then weld the voids back together but luckily I had another option. I figured that it would be a lot easier to go visit dear old Dad for some help - as well as bunch of bolts, angle and plate from his own scrap yard larder. He held his huge propane torch on the thing while I bent it with a big wrench - much easier than doing it alone.
Once the frame was made I could cut the 1/16th plate and weld it to the frame. I toyed with bolting it so that it could be replaced, then realized that I'd never seen a plow with worn out plate and it would be stronger this way.
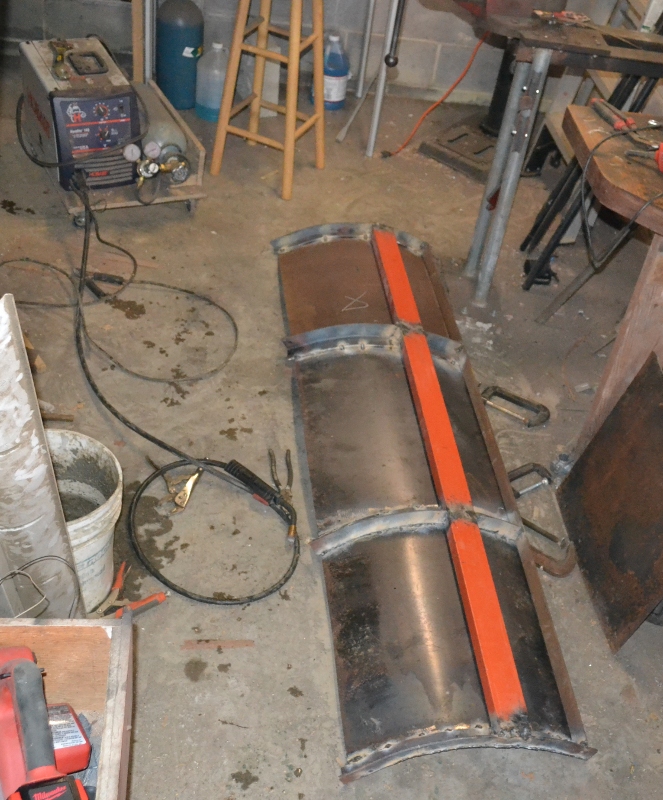
You'll notice that piece of orange channel. I found a bunch of those at the scrap yard and purchased them for a couple of bucks a piece. I think that they are lumber shelf cross-members from a Home Depot. In any case, they just looked too useful to pass up.
After the plowboard was mounted I added a 1/8" X 2" strip of strap iron to the bottom to make an even edge that would wear better.
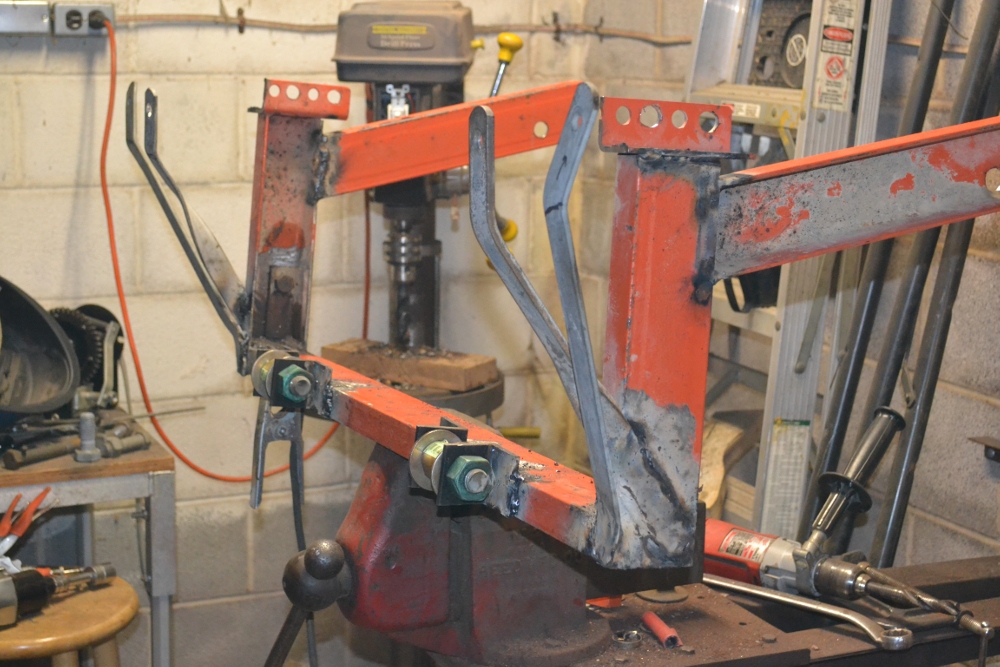
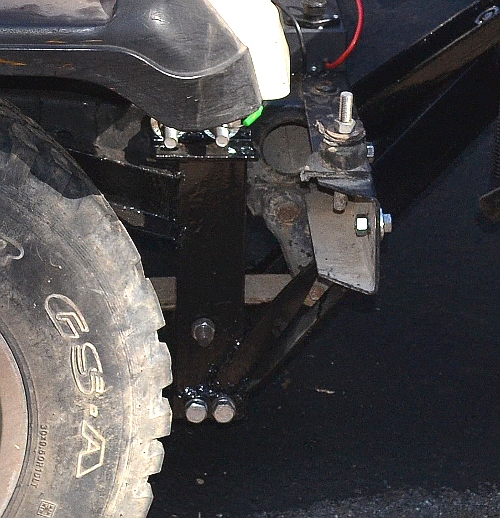
The most labor intensive part of the project was building the mount or bracket. You can buy them for a few hundred dollars but they generally only use the two front holes in the frame, which I think isn't very good for the frame, and they don't have very good support against the significant lateral forces that are applied when the plow is angled. My design uses the two front holes in the frame along with a third larger hole about a foot back. It is made in two pieces because a single piece mount of this design wouldn't go onto the frame without removing the power steering box. The two pieces bolt together on the passenger side.
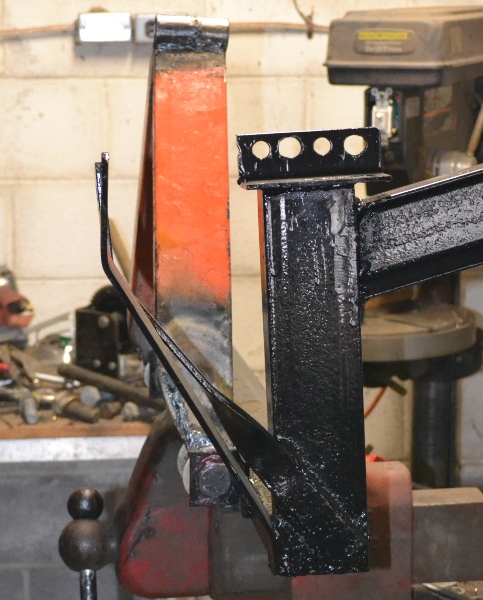
The left bracket tacked together with one of the two strap supports added is shown below. The orange rails came with pieces of angle welded to the ends and miraculously two of the holes in them just happen to line up with the front two holes in the Jeep frame. I just had to enlarge them.
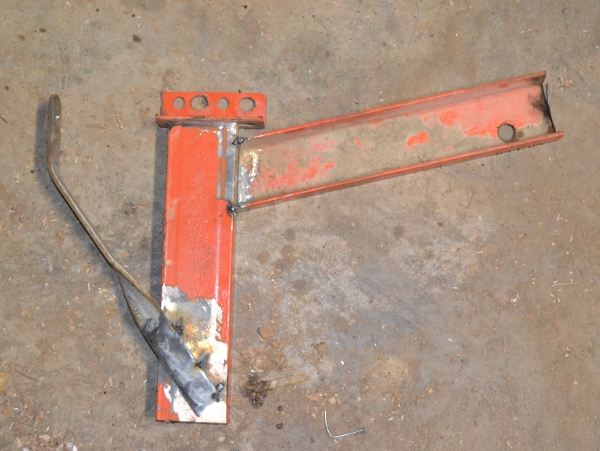
The left bracket is shown below on the Jeep. The tolerances are close enough on the bracket that I really had to tack weld it up on the Jeep or it wasn't going to fit. The holes have to be exact and there is only about 3/8" clearance on outer side of the leaf springs.
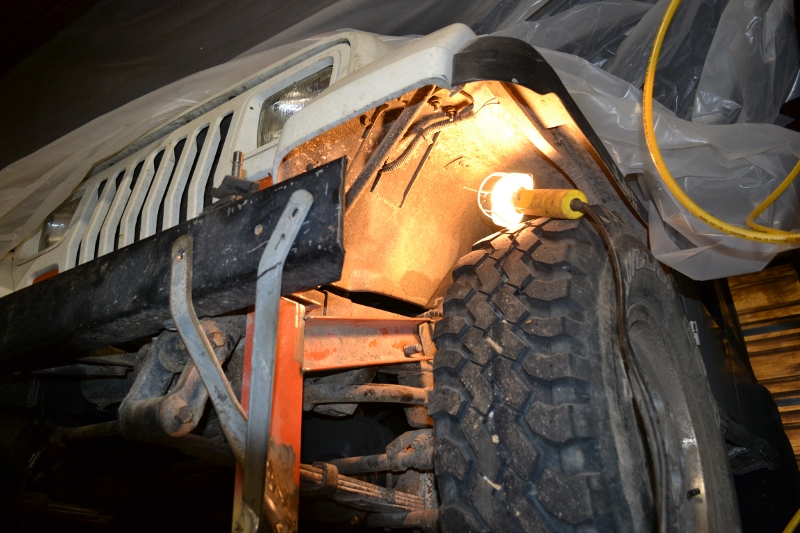
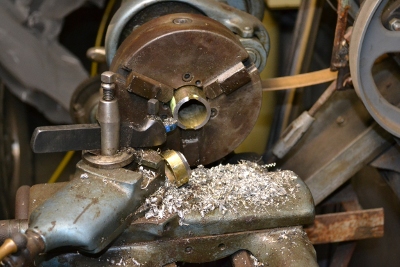
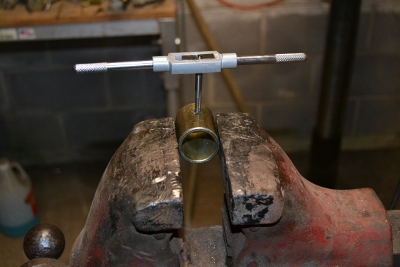
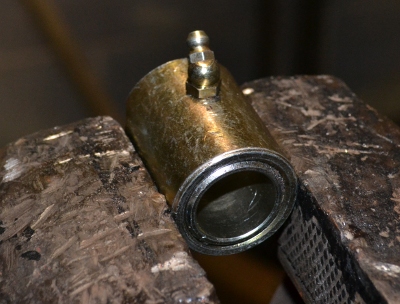
The other part of the bracket that requires some special attention is the hinges where the yoke attaches. I used 1 1/8" ID fittings which were welded to the yoke arms. Inside of these I have 7/8" OD bolts with a bushing between the bolt and fitting. Because this is the major moving part of the plow and I didn't want to have to take the thing apart to grease it, I put Zert fittings on them. I also trimmed them to size on my Stinger's 1937 South Bend Metal Lathe. You probably don't need to do that but there is going to be a lot of lateral force on them and I wanted them to wear evenly.
Below is the entire bracket welded up with the hinge assemblies. Note the bolt inside the right upright rail. That goes through a piece of angle welded to the cross-member and holds the two parts of the bracket assembly together along with the two 1/2" bolts that go from the outside of the bottom of that upright into welded nuts in the channel of the cross-member. The second photo shows the passenger side of the assembly from the outside with the three bolts that hold it together.
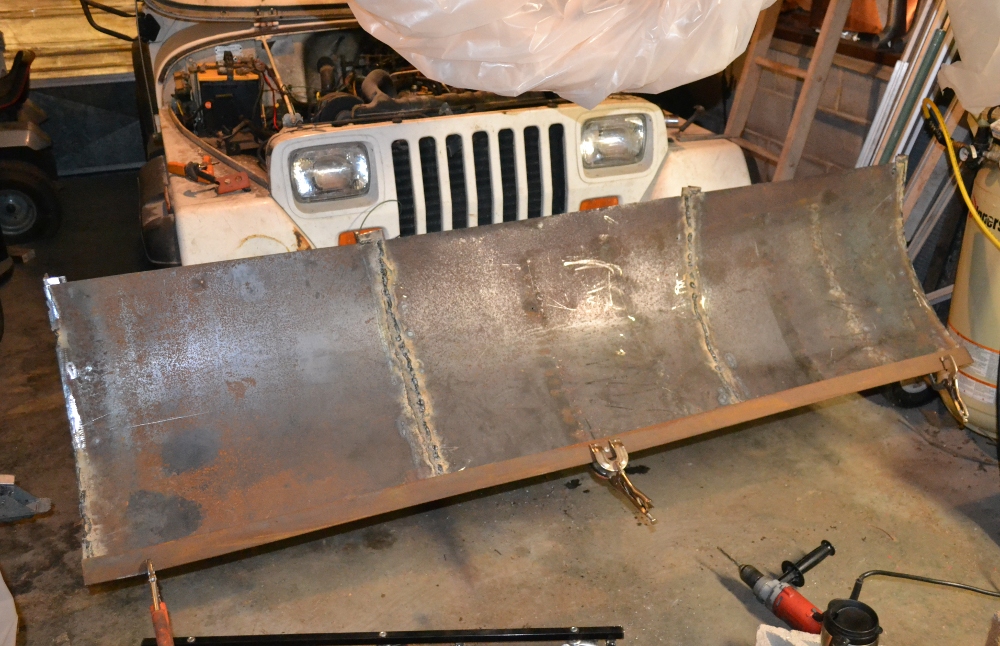
The final piece of fabrication was the yoke. I forgot to take photos when building that so below is one of it installed. In the first image below you can see the arms welded to the hinges on the bracket and the fulcrum at the plow end which is the same size fittings with a 7/8" bolt. For the yoke arms I just cut a triangular piece out of the channel and bent the side rail down to make the point at which it is welded to the hinge fitting. The other part that is visible here is the safety hinge assembly which is simply a piece of channel back to back with the cross-member on the blade. It's held on by two simple hinges made by pieces of strap with a bolt through them. Thus there are two pieces of channel back to back and hinged so that when the plow hits a rock or other low barrier it just tips forward. The springs hold it in position and make sure that it doesn't tip forward too easily. I had originally tried springs out of an old sleeper sofa that I tore apart a few years ago but they weren't heavy enough. The plow would flip in 3"-4" of snow. So, I just bought two plow springs for about $12 ea. at Tractor Supply.
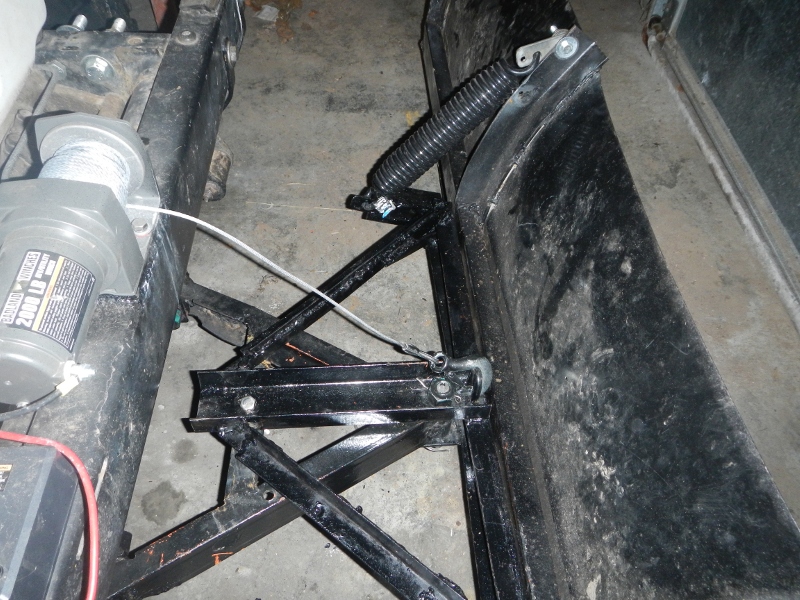
You can see that I just welded a loop in the channel of the top piece of the fulcrum to put the winch cable on. I'll probably put one on the bumper eventually as well so that I can put a safety chain on the plow for when I need to drive around with it up. You can also see that the plow manually adjusts to either a far left or far right angle simply by taking out the lynch pin, turning the blade, and putting it back in on either of the yoke arms instead of in the center. It would be simple to add a servo or a small hydraulic ram to do this but given the shape of my driveway I'm not envisioning using the angle capability much anyway. I estimate the weight of the whole assembly with the winch at about 300 lbs.
There are a lot of ways to do almost every part of this. I used a 14" chop saw and a 5" grinder to cut and shape most of the metal. You could use a cutting torch but I only used 1 large disk and 4 small disks on the whole thing and that is a lot cheaper than welding gas. A plasma cutter would be great but I don't have one. I did most of the heavy welding with my old fashioned Lincoln tombstone stick welder and 1/8" Fleetweld 37 rods - about 4lbs. I did most of the tack welding with my little Hobart 140 MIG welder just using flux core wire. It doesn't have nearly the spark halo of my bigger welder and the handle gets into tighter areas, so it was better for tack welding on the Jeep.
I didn't keep track of my hours so who knows what labor costs. There is about 270 lbs of scrap in it which is about $60. The winch was $60 plus shipping. I probably have $20 in welding rods and wire. The grinding disks were another $15. I have $35 in bushings, paint (Rustoleum thinned 30% with mineral spirits so that I could spray it) and other minutia. The pinwheels were a dollar each at the dollar store. So final cost without labor is well under $200.
Caution: when building or operating any plow of this type always use only industrial grade edge marking devices with super spinning action.