It shot 100 yd. 5 shot groups
normally between 1.5" and 2" with one group at 1.25" using Lapua
Midas L. It consistently grouped right around 2" with Eley Match
EPS. With cheaper unlubed ammo it was generally in the 2.5" to
4" range. That's not bad for a little off the shelf plinker
but I wanted something that would part pennies across a football field
and fit my arm like a fine woman.
The Modifications
Another great thing about 10/22's is that there is an enormous amount
of information about them, and possible modifications available on the
internet. I have
more than 100 pages bookmarked which provided some kind of information
and another 20 or so that I consulted regularly over the course of the
design.
The Stock
The first thing that I really needed to modify was the stock. The Ruger
stock would have been great when I was 10 but it just isn't anywhere
near big enough for me as a full size guy. I needed something a
lot longer and with a much higher comb because I shoot with a big
scope. I wanted a thumbhole and enough material around the receiver to
hold it tight. The idea of a lot of adjustability appealed to me as
well so I settled on the Fajen Legacy Edition Thumbhole Stock. It was
$99.99 from Bass Pro Shops, with free shipping and a $10 gift card as
an extra bonus.
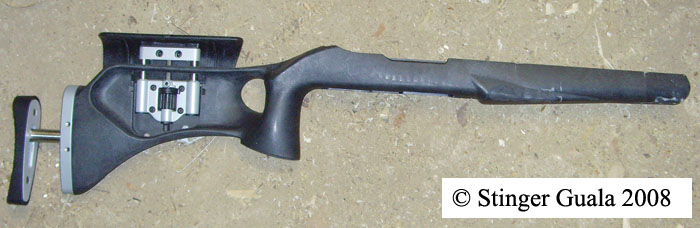
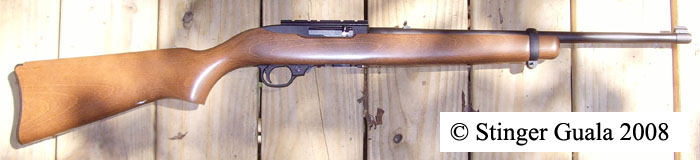
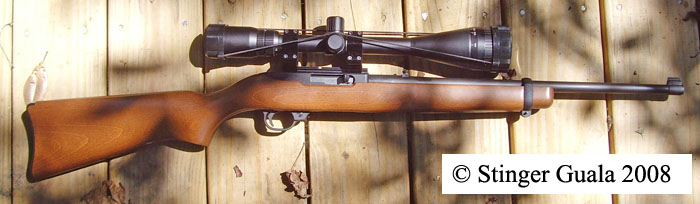
The Fajen Legacy Edition Thumbhole Stock before modification.
When I mounted the Fajen stock up, although the receiver fit was
excellent, and the barrel
floated perfectly (but with a bit less clearance than I like), it
didn't feel quite as lovely
as I had hoped. The thumbhole had an odd contour inside, I still needed
another 1/2" or so beyond the 15" pull that the adjustable butt
plate would give me and I wanted a bit more to hold onto in the
front. There were uncomfortable mold lines on the
outside as well and I just didn't like the feel of plastic on my
cheek. A
few modifications were in order.
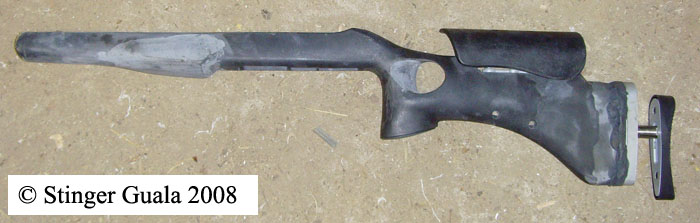
Three sticks of Rectorseal EP-400 later and it looked like this.
I used Rectorseal EP-400 to modify the stock. It worked great. You have
about 5 minutes of work time and it dries like a rock. It does get
really hot for a few minutes right after it sets up so you need
to be careful about that if you're doing thick pieces. After it
was roughed out I just sanded the whole thing down and filled the tiny
imperfections with a touch of glazing. Then it was on to primer and
paint. I also glued a piece of leather to the cheek pad and it
made a big difference.
The fit of the reciever is very tight but I added a small copper
washer to the mounting screw because I don't want the bolt head turning
on the plastic. Eventually, if things loosen up, I'll pillar bed the
receiver and maybe partially bed the barrel if I need to.
For now it seems fine just floating.
The Trigger Group
A couple of things really annoyed me about the original 10/22 trigger
group. It always seemed silly to have to disengage the bolt lock
manually in order to release the bolt and you need a small and double
jointed finger to release the magazine. The pull was also in the
range of 6 pounds and I prefer closer to 2. The bolt unlocking
was easy to
solve with a simple drop in Auto Bolt Release for $14.95 from
Volquartsen. To lighten and smooth out the trigger, I put a
Volquartsen Match Hammer and Sear ($79.60) in and then played around
with
the springs until I got it where I liked it. The hammer and sear were
nicely mated but I had to hone the original hammer strut ball which was
very roughly stamped from the factory. I actually ordered a Wolf
spring set and some other springs from Brownells for about $15 and
between
those and the ones that came with the set from Volquartsen I was able
to get a really nice feeling trigger. You can just reshape and
hone the factory hammer and sear but then you need to heat treat them
again and it's just easier and more durable to go with the
slightly more expensive full replacement set so I sprung for it.
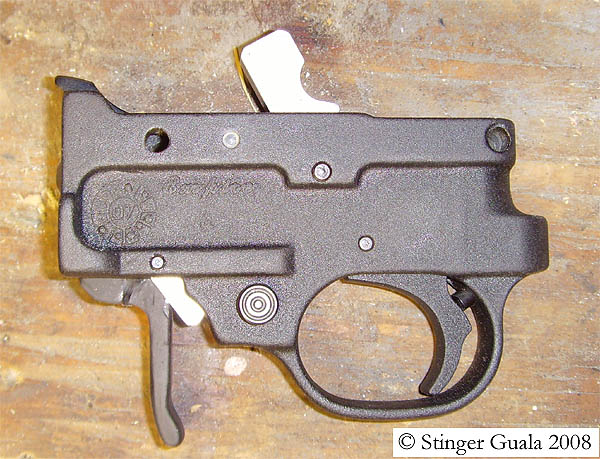
Trigger group showing the match hammer, auto bolt release and magazine
release installed.
The magazine release was a different story. I just couldn't find one
that I liked, so as usual, I made my own. It wasn't difficult,
just a buit of time and a little scrap piece of aluminum. The sequence
is below. It's both MIG welded and bolted because the aluminum is a bit
unusual in the original piece and I didn't like how it was (barely)
taking a weld. You could probably just bolt it and it would be fine.
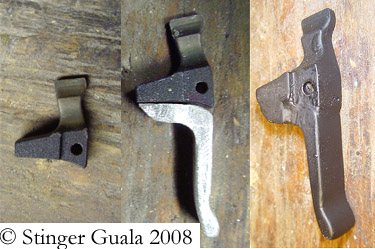
Progression of the magazine release modification.
The Bolt and Barrel
When it comes to performance in any rifle that I've owned, the trigger
and stock help me more than the rifle but the bolt and barrel are the
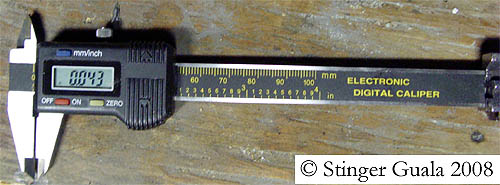
real heart of accuracy. It was easy, and free, so I headspaced the
bolt.
Mine wasn't too bad to start with at .047" but I took .004 off with a
stone to get it down to 0.043". I can't imagine using a belt
sander, as some have suggested for this. It took only about 5 minutes
with a nice Arkansas stone to get it tight and flat.
The other modification to the bolt that I needed was a new extractor. I
must have read 200 reviews of barrels and it became clear that with a
tight bentz type chamber, stovepipe jams would be an issue if I didn't
modify the extractor. Like the hammer and sear, I could have probably
modified the existing one but it was just not worth it when I could get
a really nice one from Volquartsen for $12.00. There is a
significant difference between the two as you can see in the photo.
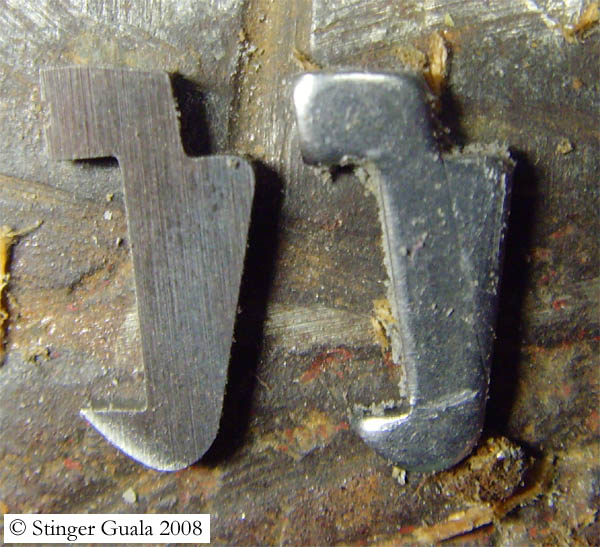
Volquartsen Exact Edge Extractor (left) vs Ruger Stock Extractor
Finally, the most important modification that I made was in replacing
the barrel. I wanted just a plain round,
.920" dia., stainless steel barrel
about 20" long. After a lot of looking, I settled on the Butler Creek
from CGW Guns for $150.49 shipped.
The Butler Creek barrels were always well reviewed (when the extractor
was modified or replaced) and just for comparison, this one was $125
less than a Clark (with shipping and tax because I live in LA) and more
than $200 less than a Shilen or Lilja (shipped). The new barrel
makes the gun heavy, it's 11 lbs with the scope on it, but I mainly use
it from a bench so it's great. The Butler Creek barrel fits like a
glove, it was very tight in the receiver but I did not have to
force it. When I put a light under the bolt to look at the alignment
with the barrel, it was airtight.
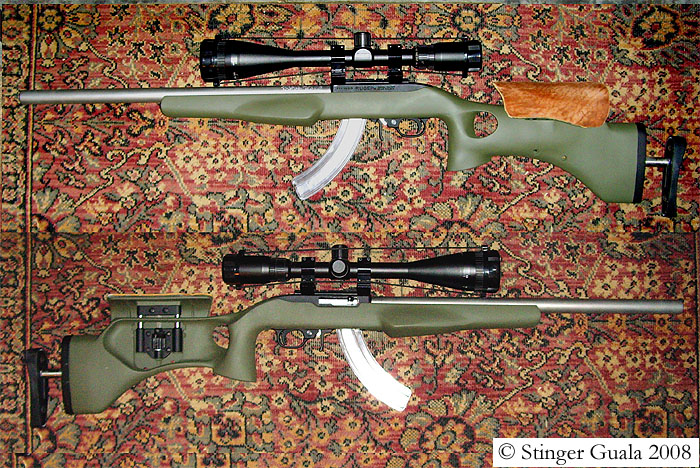
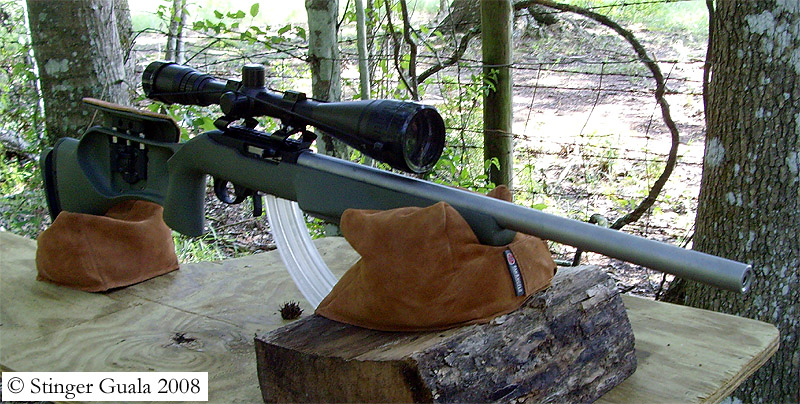
Finished Rifle
Final Notes
The new rifle generally shoots 5 shot groups right at 1 MOA or a bit
better with match grade ammunition. With Lapua Midas L I got 5 shot
groups of (0.76"-1.10") with an average of 0.97" at 100 yds over 10
groups. With Eley Tenex I got the following over 10, 3 shot groups at
100 yds (0.72, 0.70, 0.69, 0.77, 0.84, 0.95, 0.51, 0.42, 1.09, 0.84)
for an average of 0.75" or just less than 3/4 MOA.
I noticed that the barrel is tightening up in the
stock after it heats up so I'm going to look at bedding it next.
I checked the brass and hits on the cases are
conisistent so I probaly won't pin the bolt or change the firing pin.
Did I make budget? Yes, and I even had enough left for a Steel
Lips 25 round magazine - which was a waste because it never fed a round
correctly, so I traded it back for two OEM mags. I also got rid of
those useless scope rings in the pictures and replaced them with Millet
High rings which are much more stable.
Phase II
Bedding.
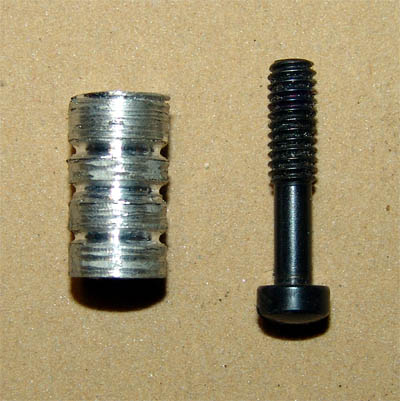
As stated above, I noticed that it was unevenly bedded so I
built up an area under the first 2" of the barrel in front of the block
(the balance point) and then did the normal sort of bedding using JB
Weld around the receiver, trigger group and frontal area. Although the
receiver fit snugly to begin with in the Fajen stock, the single
takedown screw had always had a bit or room to move so I made a little
aluminum pillar for it, drilled out the hole and epoxied it in. I also
sanded the barrel channel out a bit to assure that it was free floating
beyond the bedding. The pillar is shown below.
So did it help? Well not a lot. After a lot of fiddling around I determined that the 2" block of bedding in front of the receiver was doing more harm than good so I took it out. That left the the only big accumulation of bedding right in front of the pins that come down in front of the the clip. The rest is very thin. It brought groups with my standard ammo, Eley Club Xtra down from an avg of just about 1 MOA to just under that. The last set of groups that I shot averaged .91".
In general, the Fajen stock is fairly
tight right out of the box and if you put a washer on the takedown bolt
it is solid so bedding probably wasn't worth the trouble, but it was
fun to try.
© Stinger Guala 2008
Last updated: 22 March 2009